
Chocolate cupcakes crowned with a short, piped cone of green cream cheese frosting and a tiny Oreo witch-hat — a crisp cookie brim, a dab of orange frosting, a Hershey’s Kiss, and sprinkles for instant Halloween charm.
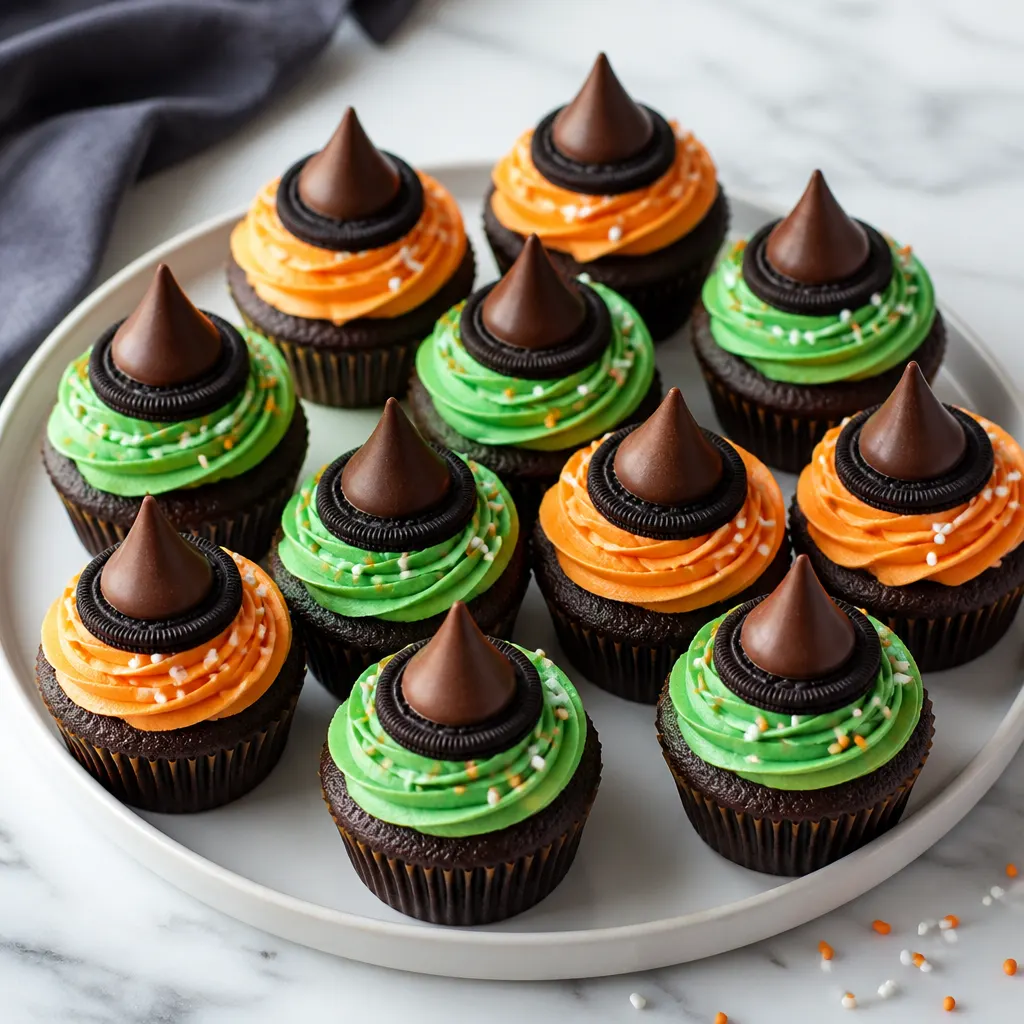
These kid-friendly Witch Hat Cupcakes take about 55 minutes total (with 30 minutes prep) and are perfect for classroom parties, a Halloween dessert table, or a quick festive bake; assemble, chill, and serve cold or room temperature for best texture.
Why You’ll Love This Recipe
Simple steps, big Halloween impact: familiar store-bought components combine with a straightforward piping technique to create cupcakes that look special without advanced decorating skills.
This recipe is built for busy hosts who want an impressive-looking Halloween treat with minimal fuss. For another quick Halloween dessert idea, try Halloween Chocolate Mousse Cups.
Ingredients You’ll Need
How to Make Witch Hat Cupcakes
- After making the cream cheese frosting according to your recipe, spoon ½ cup of the frosting into a small bowl and set it aside for the orange hat detail.
- Tint the larger remaining portion of frosting green using green food coloring until you reach a vivid shade; tint the reserved ½ cup in the small bowl orange.
- Carefully split each of the 6 Oreo cookies in half to create 12 cookie rounds. To split cleanly, hold the cookie flat, insert a butter knife between the layers and twist gently or use a controlled parallel pull so both halves remain intact.
- Place a very small spoonful of the orange frosting in the center of each Oreo half. Use just enough to create a small raised dot—this anchors the Hershey’s Kiss without overflowing the brim.
- Top each frosted Oreo half with a Hershey’s Kiss and press down gently so the kiss adheres to the frosting; immediately add a few white and orange sprinkles around the base of the kiss while the orange frosting is still soft, then set each completed hat aside to firm up.
- Fit a piping bag (or a zip-top bag with the corner snipped) with a medium round tip and pipe the green frosting into the center of each chocolate cupcake. Keep the frosting toward the center and wind up in a few short layers to form a short cone—don’t pipe all the way to the edges of the cupcake top.
- Place an Oreo witch-hat on top of each piped frosting cone. Refrigerate the assembled cupcakes, covered, until ready to serve so the hats set and the frosting firms.
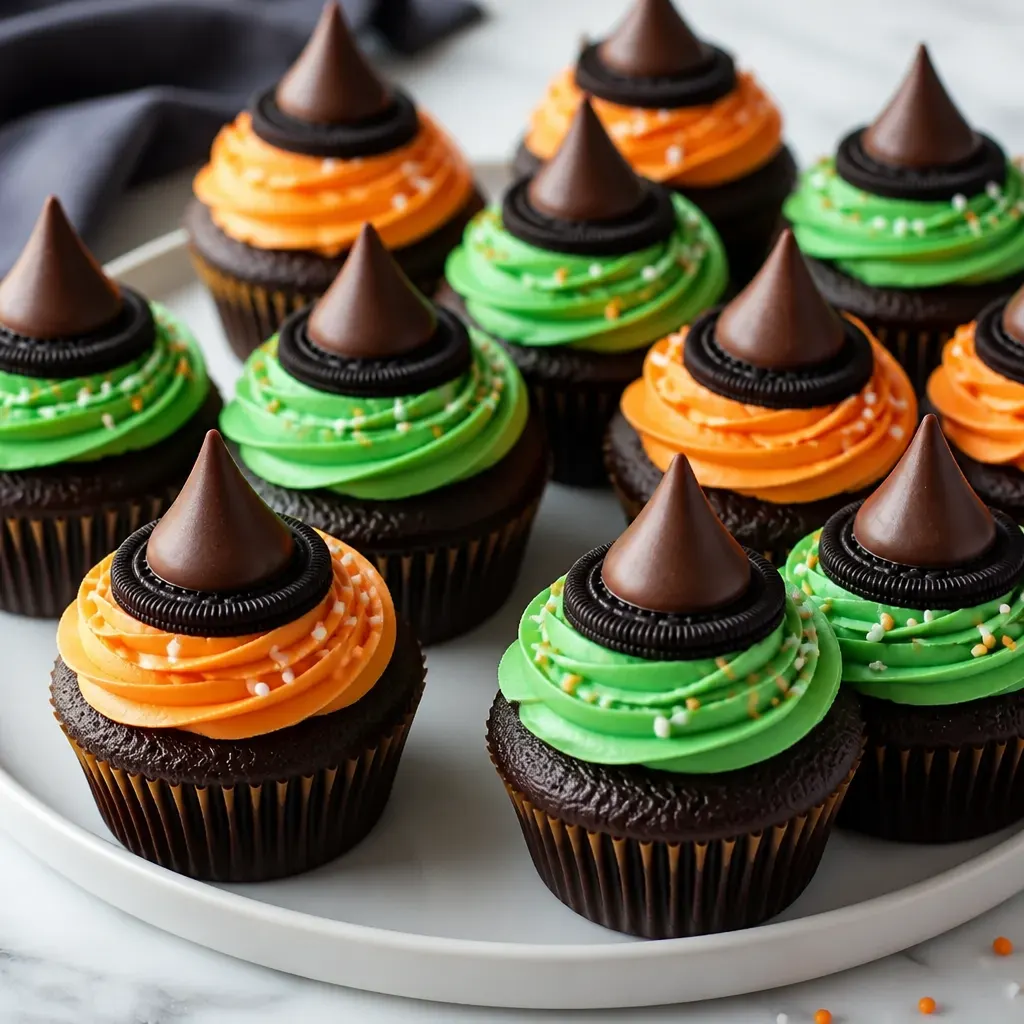
Perfect Frosting Consistency
The key to neat little green cones is a frosting that holds shape. You want cream cheese frosting that’s firm enough to stand in short layers but still squeezes through your piping tip without tearing the cupcake top.
If your frosting softens while you work, chill it briefly for 10–15 minutes, then continue piping in short bursts.
- If frosting is runny: add powdered sugar 1 tablespoon at a time until firmer.
- If frosting is too stiff: add milk 1 teaspoon at a time to loosen slightly.
- Use gel food coloring to avoid thinning the frosting with liquid dye.
Assembling Oreo Witch Hats
Make the hats on a small plate or baking sheet so you can finish them quickly and transfer them to the cupcakes. For photo steps, capture: split Oreo (alt: “split Oreo cookie showing two halves”), piping the center cone (alt: “piping short green frosting cone on cupcake”), and placing completed Oreo hat (alt: “placing Oreo witch hat on frosted cupcake”).
- Place a tiny dot of orange frosting in the center of each Oreo half before adding the Kiss so it acts like edible glue.
- Press the Kiss just enough to stick—no need to push through the cookie.
- Add sprinkles immediately after adhering the Kiss so they stick to the orange frosting.
Make-Ahead & Transport Tips
Assemble cupcakes and refrigerate them covered until time to serve. Chilling helps the frosting firm and keeps the hats secure.
For travel, place cupcakes in a single-layer box or carrier; chill them first so the frosting is set and less likely to shift during transport.
- Refrigerate assembled cupcakes covered up to 24 hours for best texture.
- If transporting farther than 30 minutes, pack the chilled box with an ice pack underneath (not touching the frosting) and keep the box level.
- Let refrigerated cupcakes sit 10–15 minutes at room temperature before serving so the frosting softens slightly for the best mouthfeel.
Tips for Success
Frosting texture: Aim for a frosting that is stiff but pipeable; if it’s too soft, add a few tablespoons of powdered sugar. If it’s too thick, thin with a teaspoon of milk at a time until it pipes smoothly.
Splitting Oreos: Split Oreos by twisting carefully or sliding a thin butter knife between layers; slow controlled motion reduces crumbs and keeps the brim intact.
Pressing the Kiss: Press each Hershey’s Kiss down gently into the orange frosting—too much pressure will crack the cookie brim; a light touch secures the chocolate while preserving the hat shape.
Allergens: These cupcakes contain dairy, gluten, and chocolate. Choose allergy-friendly cupcakes, cookies, and chocolate if you need gluten-free or dairy-free options.
Save This Recipe

More Halloween Treats
Frequently Asked Questions
Ready to Make Them
These Witch Hat Cupcakes are a quick way to add themed fun to any Halloween gathering—minimal steps, maximum effect.
If you want another easy Halloween dessert option for your spread, check out Halloween Chocolate Mousse Cups for a no-bake alternative.
Witch Hat Cupcakes
Equipment
- small bowl
- piping bag
- spoon
Ingredients
- 12 cupcakes chocolate cupcakes
- 6 cookies Oreo
- 12 pieces Hershey’s Chocolate Kisses
- 1/2 batch cream cheese frosting
- green and orange food coloring
- white and orange sprinkles
Instructions
- After making the cream cheese frosting, spoon ½ cup of the frosting into a small bowl.
- Tint the larger remaining frosting green and the reserved ½ cup orange using food coloring.
- Carefully split each of the 6 Oreo cookies in half to create 12 cookie rounds.
- Place a very small spoonful of the orange frosting in the center of each Oreo half.
- Top each frosted Oreo half with a Hershey’s kiss and press down to adhere, then add white and orange sprinkles; set the completed hat pieces aside.
- Pipe the green frosting into the center of each chocolate cupcake, keeping the frosting toward the center and winding up in a few layers to form a short cone.
- Place an Oreo witch-hat on top of each piped frosting cone. Refrigerate the assembled cupcakes covered until ready to serve.