
These Hocus Pocus Cookies are tender, soft‑centered sugar cookies swirled in purple, orange, and green with pockets of white chocolate and a crunchy confetti of sprinkles — bright, festive, and just a little spooky with optional candy eyeballs on top.
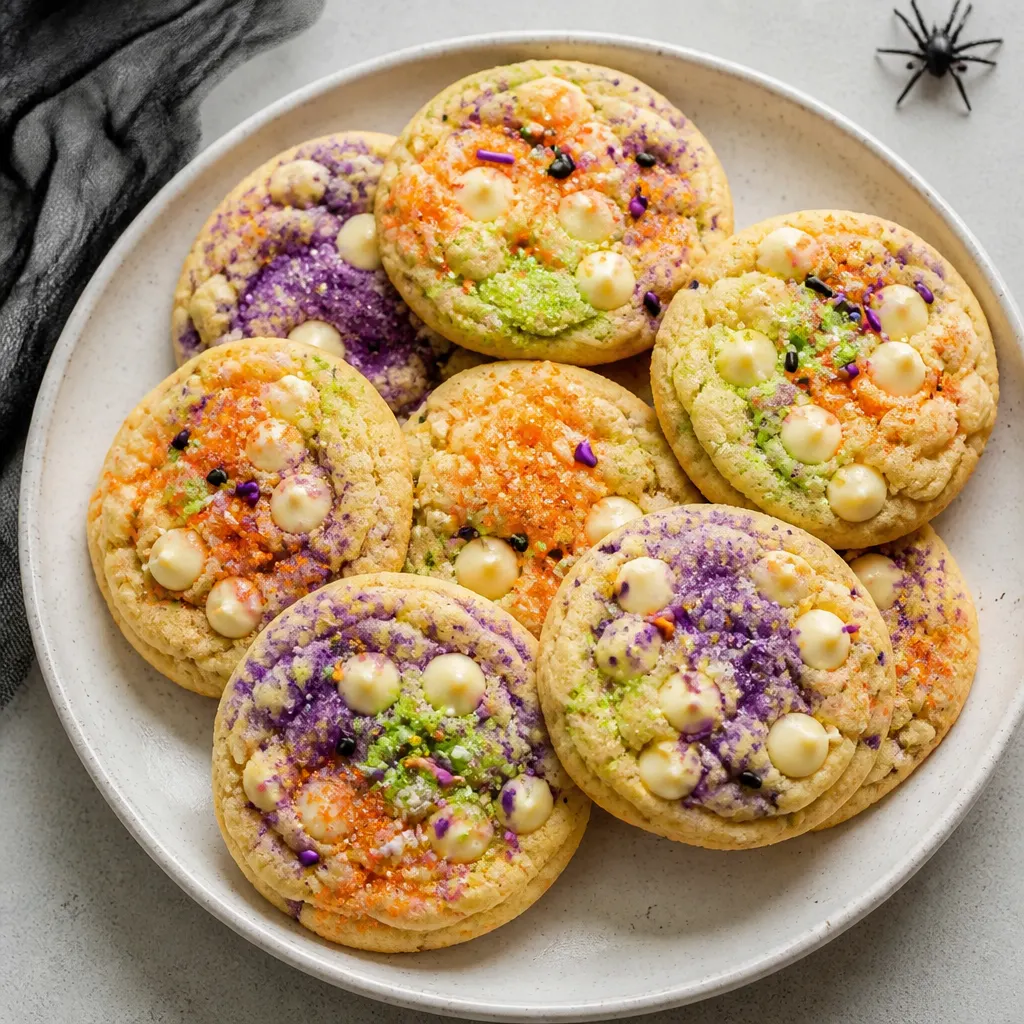
They take about 59 minutes from start to finish (chill time included) and make 24 cookies, so they’re ideal for Halloween parties, school treats, or a make‑ahead cookie platter. If you need a gluten‑free Halloween cookie option, try Halloween Gluten Free Monster Cookies.
Why You’ll Love These Cookies
A quick chill and simple marbling technique yield showy, hand‑made cookies with soft interiors and lightly crisp edges — no piping or special tools required.
These cookies balance visual fun with a reliable sugar‑cookie texture that’s forgiving for home bakers — perfect for a Halloween cookie swap or class party tray.
Ingredients You’ll Need
How to Make Hocus Pocus Cookies
- In a large mixing bowl, cream the unsalted butter and granulated sugar on high until the mixture is fluffy and there are no lumps; break apart any remaining chunks with a fork and scrape down the sides of the bowl.
- Add the pure vanilla extract and the sour cream and mix on low. Add the large eggs and mix on low until just incorporated — avoid overmixing to keep the cookies tender.
- Stir in the baking soda, cornstarch, and salt, then add only one cup of the all purpose flour and mix on low. Continue adding the remaining flour one cup at a time and mix until there are no streaks of flour left in the dough.
- Divide the dough evenly into three separate bowls. Add a few drops of gel food coloring to each bowl and mix with a spatula or spoon, adding more drops as needed until you reach the desired intensity (colors will lighten slightly in the oven). Cover each bowl with plastic wrap and refrigerate to chill for at least 30 minutes — the dough will be very sticky before chilling and firmer after chilling.
- Once chilled, preheat the oven to 375°F/190°C and line two baking sheets with parchment paper or a silicone baking mat.
- Scoop about half a tablespoon of each colored dough and roll into individual balls roughly 1 inch in diameter. Take one ball of each color, press them together, and carefully roll them into one larger marbled ball.
- Place each combined ball about 4 inches apart on the prepared baking sheets and lightly flatten them into a small cookie shape with your fingers — a gentle press lets them spread and rise without losing the marbled pattern.
- Decorate each cookie with white chocolate chips and sprinkles (or candy eyeballs) and bake for 8–10 minutes, checking for doneness after 8 minutes; the cookies should still be a little soft when removed. Allow cookies to cool on the pan for 10 minutes before transferring to a rack or plate.
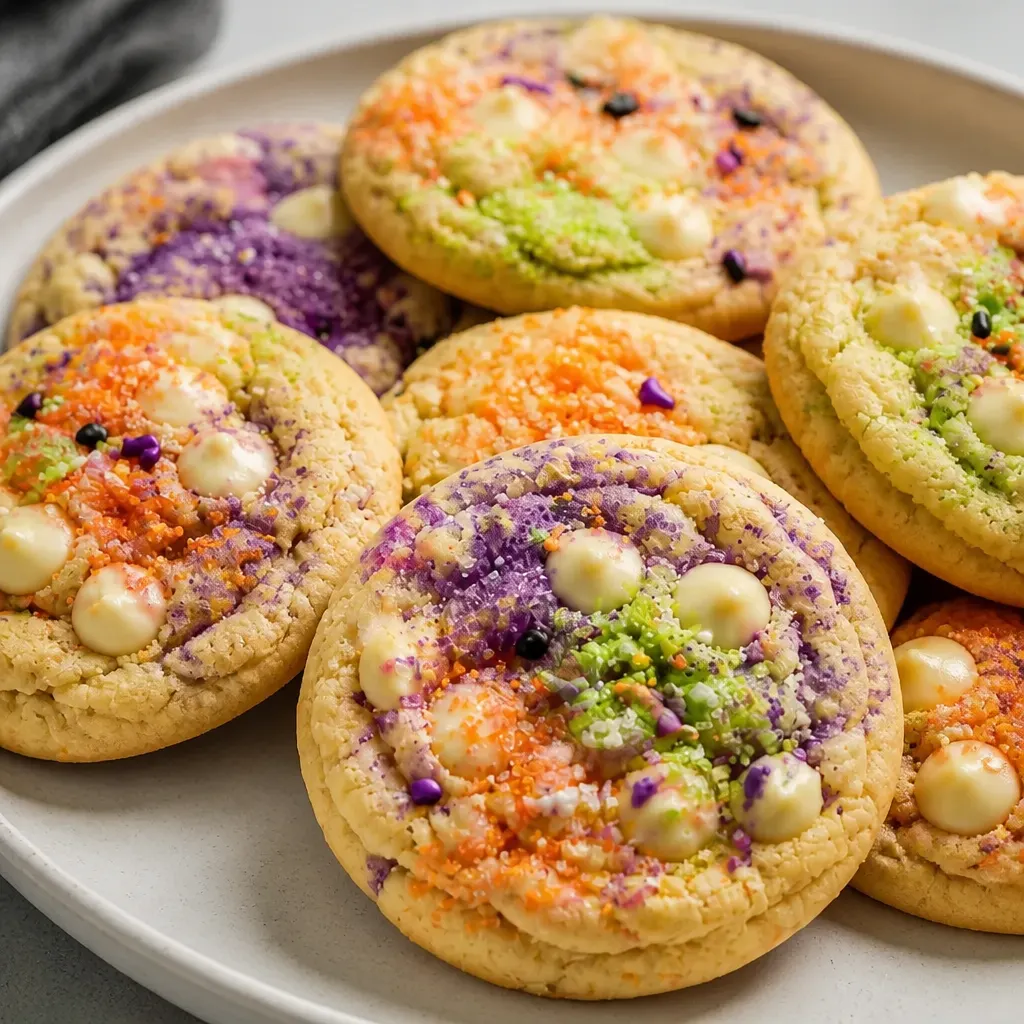
Marble the Dough
Divide the dough into three bowls and tint each with gel food coloring. Work slowly — stir a few drops at a time until you reach the shade you want because over‑mixing can mute the marbled look.
When you combine the colored balls, press them together gently and roll just enough to meld the pieces; aggressive rolling will overblend the colors.
- Add color gradually — it’s easier to darken than to lighten.
- Press one ball of each color together to form the marbled core, then roll lightly to retain distinct streaks.
Chill for Easy Shaping
Chilling is essential: the dough firms up, colors hold their definition, and sticky handling becomes manageable. Refrigerate for at least 30 minutes before shaping.
If you need extra control, chill the combined marbled balls briefly on a sheet tray before flattening and baking.
- Chill time: at least 30 minutes.
- If dough gets too soft while shaping, return it to the fridge for 10–15 minutes.
Sprinkle & Eyeball Tips
To prevent decorations from sinking, press white chocolate chips or candy eyeballs gently onto the dough just before baking rather than mixing them into very soft dough.
Use sturdier sprinkles or sanding sugar for visible color and texture — delicate nonpareils can lose definition during mixing.
- Place decorations on top after shaping, not during mixing.
- Candy eyeballs make a spooky swap for white chocolate chips — press them in firmly so they stay visible after baking.
Baker’s Tips
Manage sticky dough: The dough will be very sticky before chilling — don’t try to shape it until it’s been refrigerated for at least 30 minutes when it becomes much easier to handle.
Use gel coloring: Use gel food coloring a few drops at a time; it’s concentrated so small additions go a long way. Remember the colors will lighten slightly in the oven.
Scoop size: Scoop about ½ tablespoon per colored portion (about 1 inch balls) so the three colors combine neatly into one cookie without becoming too large.
Check doneness: Start checking at 8 minutes — cookies should be slightly soft in the center when you remove them to keep a tender interior with slightly crisp edges.
Save This Recipe

More Halloween Treats
Frequently Asked Questions
Storage & Make-Ahead
Baked cookies can be stored in an airtight container at room temperature or in the refrigerator for up to three days. Keep them layered with parchment to prevent sticking.
The dough can be made ahead and refrigerated for up to 3 days; shape and bake within that time for best results.
Hocus Pocus Cookies
Equipment
- cookie sheet
- parchment paper or silicone baking mat
- Electric Hand mixer or Stand mixer
- mixing bowl
- Small cookie scoop
Ingredients
- 1 stick unsalted butter (½ cup, 113g) softened
- 1 ¼ cup granulated sugar (150g)
- 2 teaspoons pure vanilla extract
- ½ cup sour cream
- 2 large eggs at room temp
- 1 ½ teaspoon baking soda
- ½ teaspoon cornstarch
- ¼ teaspoon salt
- 3 ¼ cups all purpose flour
- gel food coloring purple, orange, and green
- 2 cups sprinkles
- 1 cup white chocolate chips
Instructions
- In a large mixing bowl, cream the butter and the sugar on high until the mixture is fluffy and there are no lumps; break apart any chunks with a fork and scrape down the sides of the bowl.
- Add the vanilla extract and the sour cream and mix on low, then add the eggs and mix on low until just incorporated; do not overmix.
- Add the baking soda, cornstarch, salt, and just one cup of the all purpose flour, then mix on low. Slowly add the rest of the flour one cup at a time and mix until there are no more streaks of flour in the dough.
- Divide the dough evenly into three bowls and add a few drops of gel food coloring to each bowl, mixing with a spatula or spoon until you reach the desired color (cookies will lighten slightly when baked). Cover the bowls with plastic wrap and refrigerate to chill for at least 30 minutes; the dough will be sticky but firmer after chilling.
- Once the dough has chilled, preheat the oven to 375°F/190°C and line two baking sheets with parchment paper or a silicone mat.
- Scoop about half a tablespoon of each colored dough and roll into individual balls (about 1 inch in diameter). Grab one ball of each color, press them together, and carefully roll them into one larger marble ball.
- Place each combined ball about 4 inches apart on the prepared baking sheets and lightly flatten them into a small cookie shape with your fingers to allow for spreading.
- Decorate each cookie with white chocolate chips and sprinkles, then bake for 8-10 minutes, checking for doneness after 8 minutes; they should still be a little soft when removed. Allow the cookies to cool in the pan for 10 minutes before transferring.