
This rye sour starter is tangy, slightly caraway-scented, and built to lend authentic flavor to Jewish rye. The texture moves from a thin, bubbly ferment to a thick, dough-like levain over three staged builds—caraway and a touch of minced onion give it the classic savory lift.
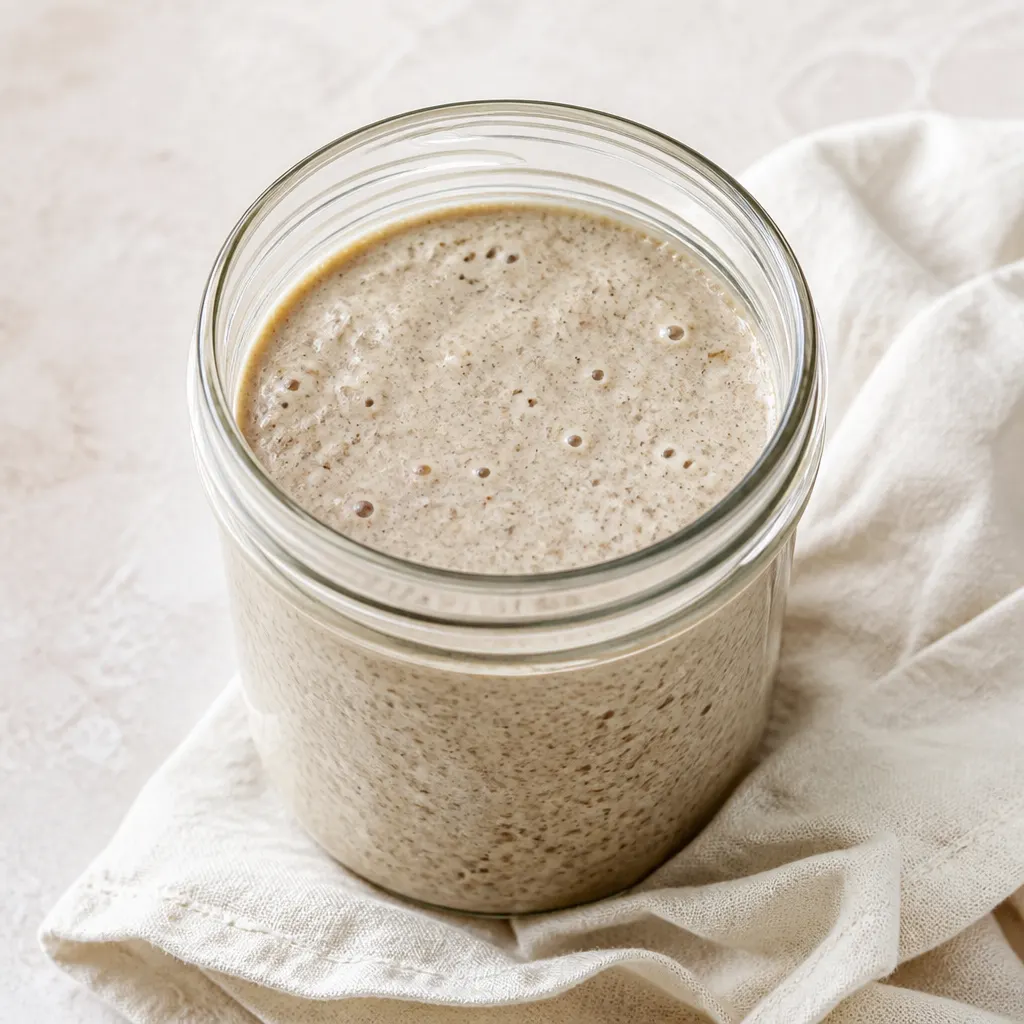
Plan for a make-ahead schedule: an initial ferment up to 24 hours, then three staged rises of about 4 to 8 hours each. It’s ideal for prepping the day before baking or for a slow overnight rise before you shape and bake your rye loaves.
Why You’ll Love This Starter
A rye sour starter adds the deep, slightly sour flavor and tender crumb characteristic of Jewish rye without needing a long, complicated wild starter build.
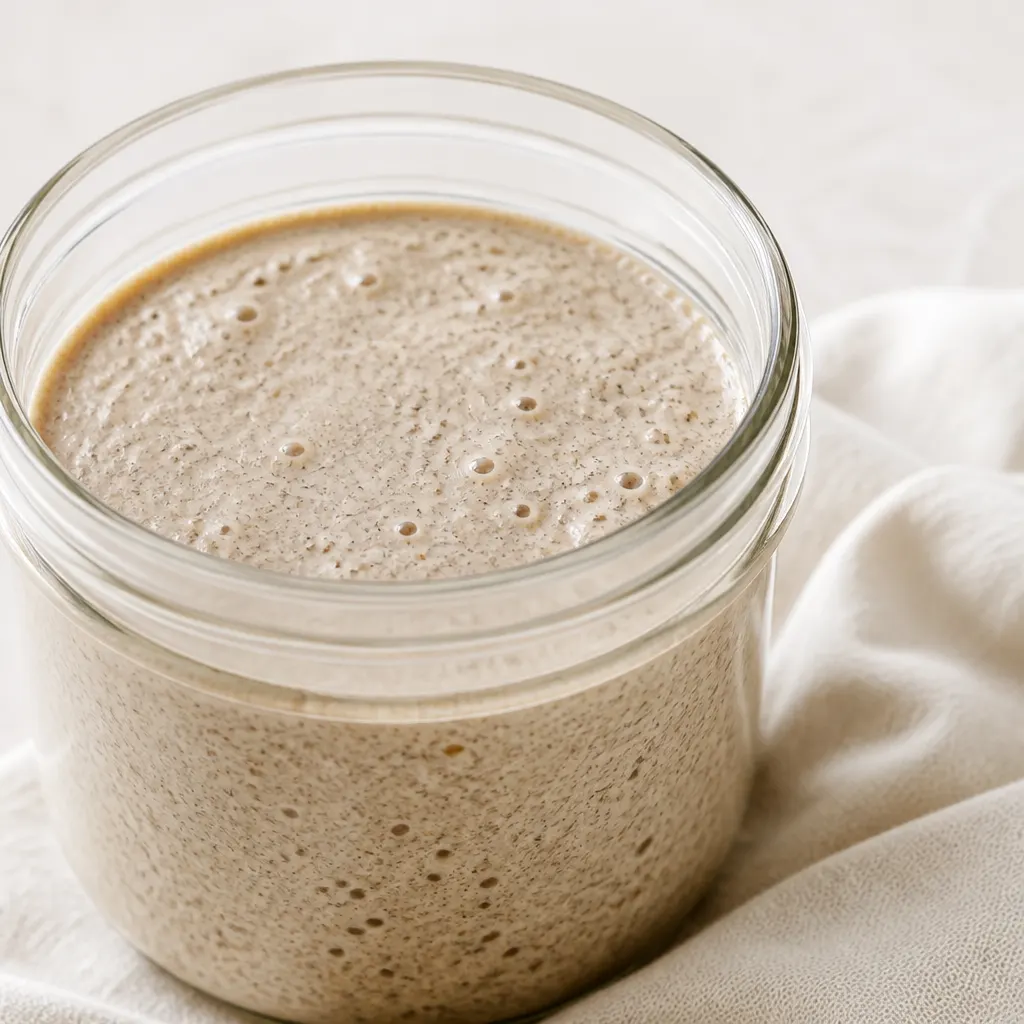
Follow the staged schedule and the visual cues (bubbly/fermented, doubled in size, cracked floured top, dough-like consistency) to ensure a reliable, active starter for your bread.
Ingredients You’ll Need
How to Make the Starter
- Begin the rye sour starter: In a large bowl combine the rye flour, active dry yeast, warm water (110 degrees F), crushed caraway seeds and minced onion; stir with a wooden spoon until smooth. The mixture should be thin and soupy. Cover with plastic wrap and allow to stand in a warm spot until bubbly and fermented, up to 24 hours.
- Prepare Stage One: In a large bowl combine the 1/2 cup (125 ml) water, 1¼ cups of the flour, and the starter; stir with a wooden spoon until smooth. The mixture should pull slightly and may start to come away from the sides of the bowl. Wipe down the sides of the bowl and sprinkle the remaining ¼ cup flour over the entire surface of the sour. Cover with plastic wrap and let stand in a warm place until doubled in size and the floured top appears cracked with wide openings, about 4 to 8 hours. Avoid letting the mixture collapse.
- Prepare Stage Two: To the Stage One sour add the 1/2 cup water and ¾ cup of the flour; mix until smooth. Wipe down the sides of the bowl and sprinkle the remaining ¼ cup flour over the entire surface of the sour. Allow to rise in a warm area until doubled in size, about 4 to 8 hours.
- Prepare Stage Three: To the Stage Two sour add the 1/2 cup warm water (125 ml, warm, 110 degrees F) and the 1 cup flour; mix until smooth. Add more flour, ¼ cup at a time, until a dough-like consistency is reached. Cover with plastic wrap and leave in a warm spot until doubled in size, about 4 to 8 hours.
- At the end of Stage Three the starter should be dough-like, noticeably risen, and ready to be used in the bread recipe you’re following.
- Before adding the caraway to the starter, you can grind the seeds in a coffee or spice grinder or grind with a mortar and pestle for a finer distribution of flavor.
- When preparing Stages One and Two aim for a thick consistency as close as possible to that of a soft dough; if the mixture is too soupy, add more flour ¼ cup at a time and mix until smooth.
- Timing recommendation: prepare Stages One and Two on the same day, refrigerate the second stage overnight if desired, and prepare Stage Three the morning of baking. If you plan to bake first thing in the morning, prepare Stage Three the evening before so it can rise slowly overnight.
Staged-build Schedule
This starter uses a multi-stage approach so you can plan baking day precisely. Expect an initial ferment up to 24 hours, then three staged builds with roughly 4 to 8 hours per stage for Stages One, Two and Three.
- Initial ferment: up to 24 hours — thin, soupy, becoming bubbly and fermented.
- Stage One: 4 to 8 hours — aim for doubled volume and a cracked, floured top.
- Stage Two: 4 to 8 hours — should double again and become thicker.
- Stage Three: 4 to 8 hours — mix to a dough-like consistency and allow a final doubling before use.
Fix Soupy Starter
If either Stage One or Stage Two looks too loose, correct it gradually rather than adding a large amount of flour at once.
- Add flour ¼ cup at a time and mix until the mixture reaches a thick, soft-dough feel.
- Wipe down the sides of the bowl and lightly flour the surface of the starter as instructed to monitor the cracked-top cue.
- Keep the starter in a warm area to encourage an active rise after adjustments.
Feed and Refrigerate
To store between uses, refrigerate the starter and stir it down every 3 to 4 days. Every 10 to 12 days discard half and refresh by mixing in equal amounts of rye flour and water.
If a bit of discoloration appears on top, skim it off; minor surface discoloration does not necessarily mean the starter must be discarded.
- Stir down every 3–4 days to redistribute activity.
- Refresh (discard half, feed equal parts flour and water) every 10–12 days to keep the culture healthy.
- Use warm water for feedings if the starter has been refrigerated so it wakes up promptly.
Tips for Success
Watch the cues: Rely on visual readiness: bubbly and fermented for the initial mix, doubled in size and a cracked floured top for Stage One, and a dough-like consistency for Stage Three.
Fixing texture: If a stage is too soupy, add more flour ¼ cup at a time and mix until smooth (this troubleshooting step is recommended verbatim in the recipe).
Temperature matters: Use warm water at 110 degrees F where specified to encourage activity; if your sour was refrigerated, use warm water for refreshes.
Flour choice: The book recommends white rye flour; King Arthur is a good example if you want a lighter rye flavor and color.
Save This Recipe
More recipes to try
Frequently asked questions
Using the Starter in Bread
When Stage Three has doubled and feels dough-like, it is ready to be incorporated into your Jewish rye bread formula—use it as the active levain for authentic flavor and texture.
While your starter is fermenting, you might enjoy making quick refrigerator pickles to serve alongside rye sandwiches: Refrigerator Pickles.
Rye Sour Starter (for Jewish Rye Bread)
Equipment
- Large bowl
- wooden spoon
- plastic wrap
- coffee or spice grinder
- mortar and pestle
Ingredients
- 1/2 cup rye flour 51 g
- 1/8 teaspoon active dry yeast 0.13 teaspoon
- 1 cup water warm, 250 ml, 110 degrees F
- 1 tablespoon caraway seeds crushed
- 1 teaspoon onion minced
- 1/2 cup water 125 ml
- 11/2 cups rye flour 153 g
- 1 recipe Sour Starter
- 1/2 cup water 125 ml, warm, 110 degrees F
- 1 cup rye flour 102 g
- 1/2 cup water 125 ml, use warm water if sour has been refrigerated
- 1 cup rye flour 102 g, or more
Instructions
- Begin the rye sour starter: In a large bowl combine the rye flour, active dry yeast, warm water (110 degrees F), crushed caraway seeds and minced onion; stir with a wooden spoon until smooth. The mixture should be thin and soupy. Cover with plastic wrap and allow to stand in a warm spot until bubbly and fermented, up to 24 hours.
- Prepare Stage One: In a large bowl combine the water, 1¼ cups of the flour, and the starter; stir with a wooden spoon until smooth. The mixture should pull slightly and may start to come away from the sides of the bowl. Wipe down the sides of the bowl and sprinkle the remaining ¼ cup flour over the entire surface of the sour. Cover with plastic wrap and let stand in a warm place until doubled in size and the floured top appears cracked with wide openings, about 4 to 8 hours. Avoid letting the mixture collapse.
- Prepare Stage Two: To the Stage One sour add the water and ¾ cup of the flour; mix until smooth. Wipe down the sides of the bowl and sprinkle the remaining ¼ cup flour over the entire surface of the sour. Allow to rise in a warm area until doubled in size, about 4 to 8 hours.
- Prepare Stage Three: To the Stage Two sour add the water and the 1 cup flour; mix until smooth. Add more flour, ¼ cup at a time, until a dough-like consistency is reached. Cover with plastic wrap and leave in a warm spot until doubled in size, about 4 to 8 hours. At this point the starter is ready to be used in the bread.
- The caraway seeds can be ground in a coffee or spice grinder or with a mortar and pestle before adding to the starter.
- When preparing Stages One and Two aim for a thick consistency as close as possible to that of a soft dough; if the mixture is too soupy, add more flour ¼ cup at a time and mix until smooth.
- Timing recommendation: prepare Stages One and Two on the same day, refrigerate the second stage overnight if desired, and prepare Stage Three the morning of baking. If you plan to bake first thing in the morning, prepare Stage Three the evening before so it can rise slowly overnight.