
Crisp, peanut-butter cookie cups studded with crushed chocolate chip Brownie Brittle give every bite a crunchy chocolate surprise, topped with pillowy cream cheese frosting piped into little ghost swirls and dotted with mini chocolate chip faces.
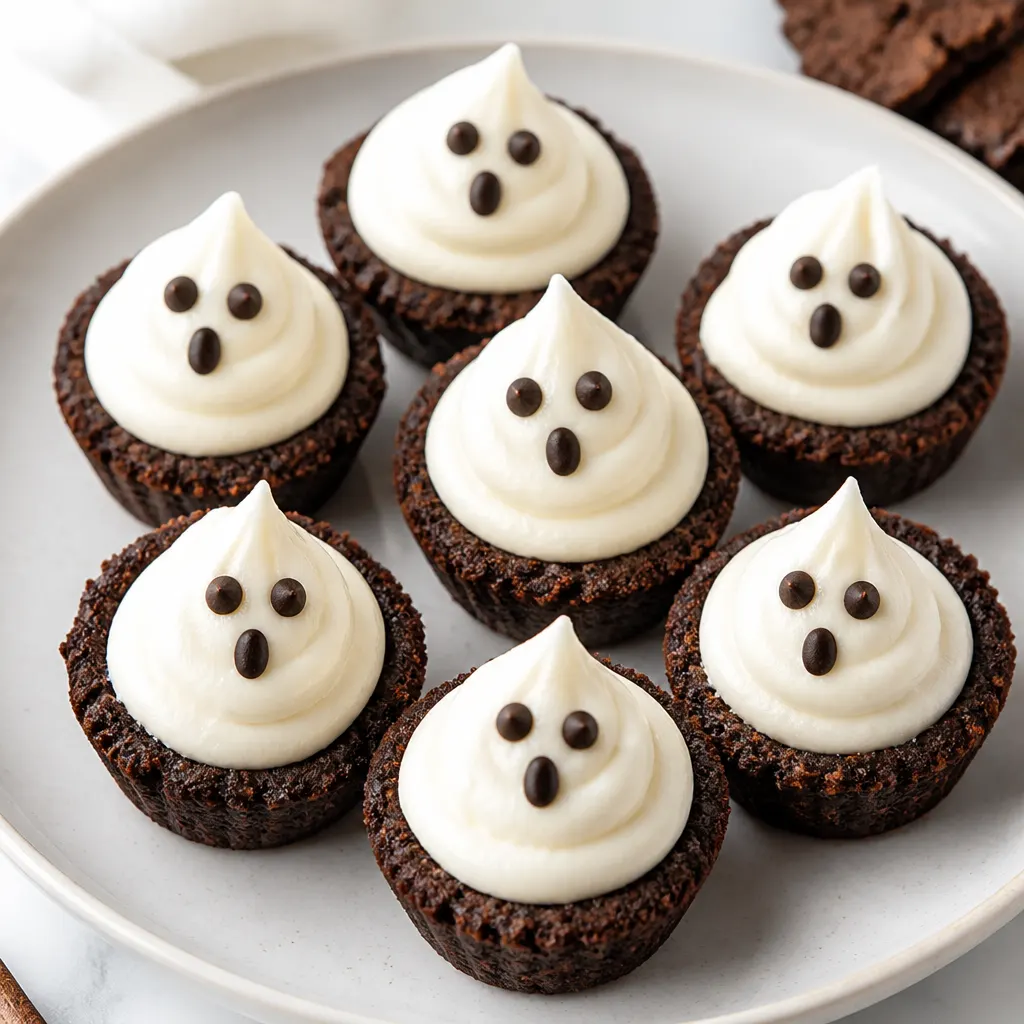
These playful mini cups take about 32 minutes from start to finish, making them ideal for a Halloween party or an after-school treat—if you love rich brownie flavor, see BEST Brownies Recipe for brownie inspiration.
Why You’ll Love This Recipe
Tiny, handheld, and highly decorative: these cookie cups combine crisp edges, a tender peanut-butter interior, and a creamy, make-ahead frosting that kids can help decorate.
They’re festive without fuss—perfect for a Halloween table or a themed lunchbox treat.
Ingredients You’ll Need
How to Make Cookie Cups
- Preheat the oven to 350°F and spray a mini muffin tin with cooking spray; set the tin aside.
- In a large bowl, beat together the natural peanut butter, brown sugar, and white sugar with an electric hand mixer until the mixture is smooth and fluffy.
- Add the egg white and 1/8 teaspoon vanilla extract to the peanut-butter mixture and beat until well combined.
- Stir in the crushed chocolate chip Brownie Brittle, 1/4 teaspoon baking powder, and 1/8 teaspoon salt until the mixture comes together into a ball.
- Form 1-tablespoon-sized balls of dough and place each into the prepared mini muffin tin. Press down and press around the sides of each ball to form little cups.
- Bake the cookie cups for 10-12 minutes, until the edges begin to crisp and brown; the cups will puff up in the oven.
- Immediately after removing the tin from the oven, press the centers of each puffed cup with your finger or the back of a spoon to reform the cup shape while the cookies are hot and pliable.
- Let the cups cool in the muffin tin for 10 minutes, then transfer to a cooling rack and let them cool completely before filling to avoid melting the frosting.
- While the cups cool, make the cream cheese frosting by beating the softened butter and reduced-fat cream cheese together in a large bowl until light and fluffy.
- Add 1 teaspoon vanilla extract, then with the mixer on low speed gradually add the sifted confectioners’ sugar; once incorporated, increase to high speed and beat until light and fluffy, about 2-3 minutes.
- Spoon the cream cheese icing into a piping bag, fill each cooled cookie cup with a ghost swirl, and use mini chocolate chips to create simple ghost faces.
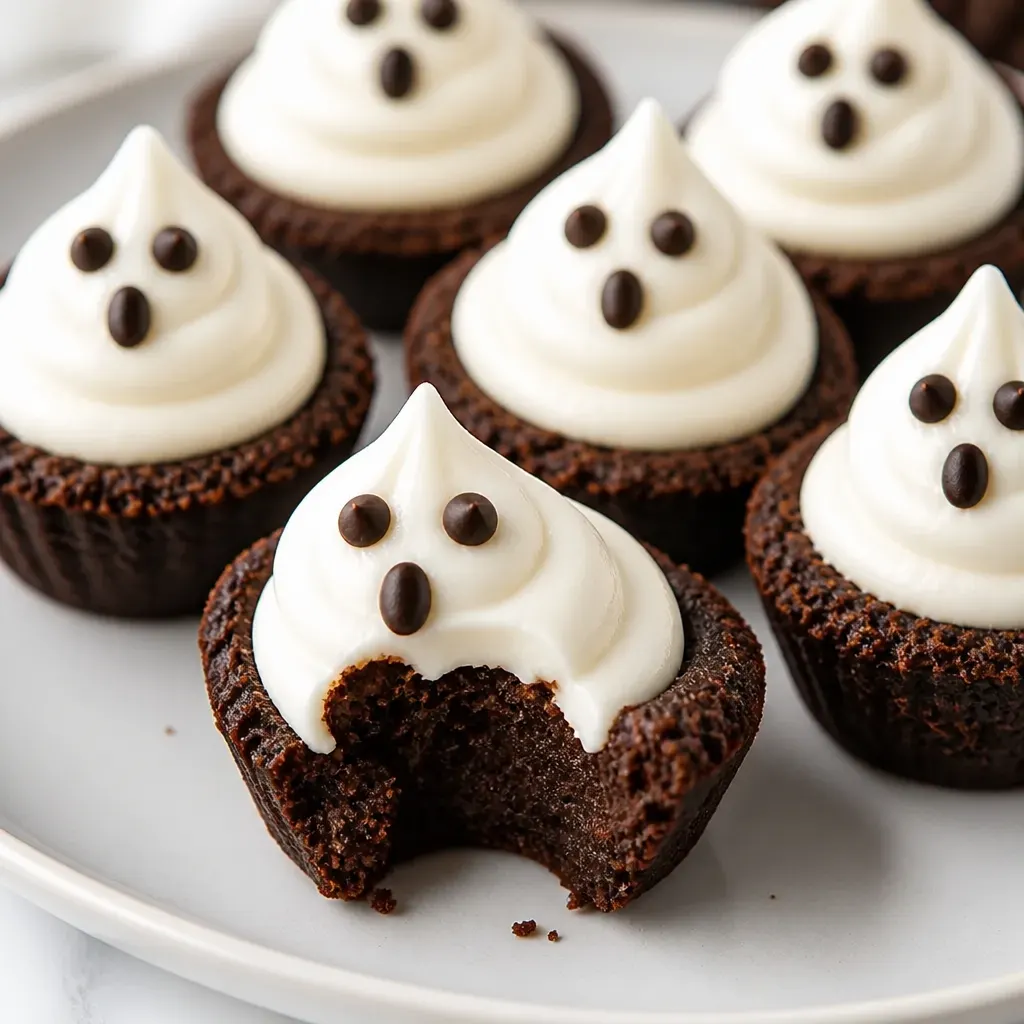
Forming the Cookie Cups
Work with 1-tablespoon-sized portions so each cup is uniform and fits neatly in the mini muffin tin. Press down and then press around the sides to build a thin, even wall that will hold the filling.
- Scoop dough with a 1-tablespoon scoop for consistent sizing.
- Press straight down then up the sides with your thumb or the back of a spoon to create a small cavity.
- If dough sticks to your fingers, dampen them slightly or use a non-stick spoon.
Keep the Cups Crisp
The crunch is part of the charm—bake until edges just brown and press centers immediately to set the shape. Store baked, unfilled cups at room temperature up to 2 days; once filled, refrigerate for up to 3 days to keep the frosting fresh.
- Unfilled cups: room temperature, airtight container, up to 2 days.
- Filled cups: refrigerate in a single layer, covered, up to 3 days.
- Re-crisp in a 300°F oven for a few minutes if needed before serving.
Ghost Decorating Tips
Pipe the frosting with a round tip for a classic ghost mound, then use two mini chocolate chips for eyes and a smaller chip or a dot of melted chocolate for a mouth. Let kids add their faces for a fun decorating activity.
- Use a round piping tip (or snip the end of a piping bag) for smooth ghost swirls.
- Press mini chocolate chips gently into the top so they stick to the frosting.
- For variety, add small candy eyes, orange sprinkles, or edible glitter for a festive touch.
Tips for Success
Press while hot: As soon as the cups come out of the oven press the centers with a finger or spoon—this preserves the cup shape because the cookies are still pliable right after baking.
Cool completely before filling: Wait until the cookie cups are completely cool before piping frosting; filling warm cups will cause the frosting to soften and lose its shape.
Swap ideas: If you don’t have Brownie Brittle, use another brittle or very finely chopped crunchy cookie to maintain the crunch and chocolate flavor.
Refresh crispness: To re-crisp stored cups, warm them in a 300°F oven for 3-5 minutes—cool slightly before filling.
Save This Recipe

More recipes
Frequently asked questions
Ready to make
These Brownie Brittle Cookie Ghost Cups are an easy, hands-on Halloween treat—bake, cool, and let kids decorate the ghost faces for a memorable party activity.
If you’re planning a full Halloween spread, consider adding other seasonal treats from the recipe collection to round out the table.
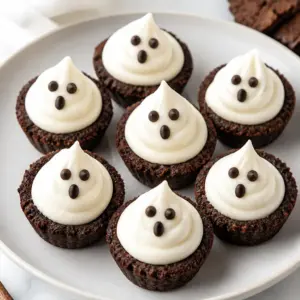
Brownie Brittle Cookie Ghost Cups
Equipment
- mini muffin tin
- oven
- mixing bowl
- electric hand mixer
- Cooling rack
- piping bag
- spoon
Ingredients
- 1/4 cup natural peanut butter
- 2 tablespoons brown sugar packed
- 2 tablespoons white sugar
- 1 egg white
- 1/8 teaspoon vanilla extract
- 3/4 cup chocolate chip Brownie Brittle crushed into crumbs
- 1/4 teaspoon baking powder
- 1/8 teaspoons salt
- 1/4 cup butter at room temperature
- 1/2 cup reduced-fat cream cheese softened
- 1 teaspoon vanilla extract
- 1 cup confectioners’ sugar sifted
- Mini chocolate chips for decorating
Instructions
- Preheat the oven to 350°F and spray a mini muffin tin with cooking spray; set the tin aside.
- In a large bowl, beat together the natural peanut butter, brown sugar, and white sugar with an electric hand mixer until smooth and fluffy, then add the egg white and 1/8 teaspoon vanilla extract and beat until well combined.
- Stir in the crushed chocolate chip Brownie Brittle, 1/4 teaspoon baking powder, and 1/8 teaspoon salt until the mixture comes together into a ball.
- Divide the dough into 1-tablespoon-sized balls and place them into the prepared mini muffin tin, pressing down and around the sides of each to form a small cup.
- Bake the cookie cups for 10-12 minutes, until the edges begin to crisp and brown; they will puff up while baking, so as soon as they come out of the oven press the centers with your finger or a spoon to reform the cups.
- Let the cups cool in the muffin tin for 10 minutes, then transfer them to a cooling rack and let cool completely before filling.
- While the cups cool, make the cream cheese frosting by beating the softened butter and reduced-fat cream cheese together in a large bowl until light and fluffy.
- Stir in 1 teaspoon vanilla extract, then with the mixer on low gradually add the sifted confectioners’ sugar; once incorporated, increase the speed to high and beat until light and fluffy, about 2-3 minutes.
- Spoon the cream cheese icing into a piping bag, fill each cooled cookie cup, and use mini chocolate chips to create ghost faces on top.